こんにちは。
今回は、前回作ったトーストの応用編で、枠の形を変えてみようと
思います。
↓ 枠の形用のトーストレイアウトを用意します。
新規 > Layout resource file を選択します。
↓ File nameは任意でつけます。
Root element は、LinearLayout とつけます。
↓ 以下のように自動作成されます。
↓ トーストの枠に使用する吹き出しを作成しました。
スプレッドシートで吹き出しを使用して作成しキャプチャした画像を、
GIMPで加工しています😃
↓ この画像をdrawableフォルダにセットします。
↓ あとは、Textタブで以下のように記述します。
ポイントは赤字の部分です。
IDを指定することと、表示するテキストは中央真ん中に表示されるよう
指定します。
<LinearLayout xmlns:android=”http://schemas.android.com/apk/res/android”
android:id=”@+id/toast_layout_fukidashi”
android:orientation=”vertical” android:layout_width=”match_parent”
android:layout_height=”match_parent”>
<TextView
android:id=”@+id/text”
android:layout_width=”145dp”
android:layout_height=”106dp”
android:background=”@drawable/fukidashi”
android:text=”うまい!!”
android:textColor=”#0e0e0e”
android:gravity=”center” />
</LinearLayout>
あとは、MainActivity.javaの記述を変更していきましょう。
↓ ボタンを押された後の処理には、先ほど作成したレイアウトと枠の画像を
指定してる処理を追加しています。
button.setOnClickListener(new View.OnClickListener() {
private boolean hantei = true;
// LayoutInflaterクラスを指定
LayoutInflater inflater = (LayoutInflater) getSystemService(LAYOUT_INFLATER_SERVICE);
// レイアウトと画像を指定
View layout = inflater.inflate(R.layout.toast_layout,
(ViewGroup) findViewById(R.id.toast_layout_fukidashi));
private boolean hantei = true;
// LayoutInflaterクラスを指定
LayoutInflater inflater = (LayoutInflater) getSystemService(LAYOUT_INFLATER_SERVICE);
// レイアウトと画像を指定
View layout = inflater.inflate(R.layout.toast_layout,
(ViewGroup) findViewById(R.id.toast_layout_fukidashi));
↓ トースト作成クラスには、setViewを足して、上記で指定した変数を
セットします。
メッセージは使用しないので引数から消しています。
(ここはもっとうまいやり方がありそうですが・・・💦)
private void makeToast(View layout, int g, int x, int y){
// トーストの設定(短めに表示)
Toast toast = Toast.makeText(this, “”, Toast.LENGTH_LONG);
// 位置調整
toast.setGravity(g, x, y);
// 吹き出しのレイアウトをセット
toast.setView(layout);
// トーストを表示
toast.show();
}
// トーストの設定(短めに表示)
Toast toast = Toast.makeText(this, “”, Toast.LENGTH_LONG);
// 位置調整
toast.setGravity(g, x, y);
// 吹き出しのレイアウトをセット
toast.setView(layout);
// トーストを表示
toast.show();
}
では、エミュレータを起動してみましょう。
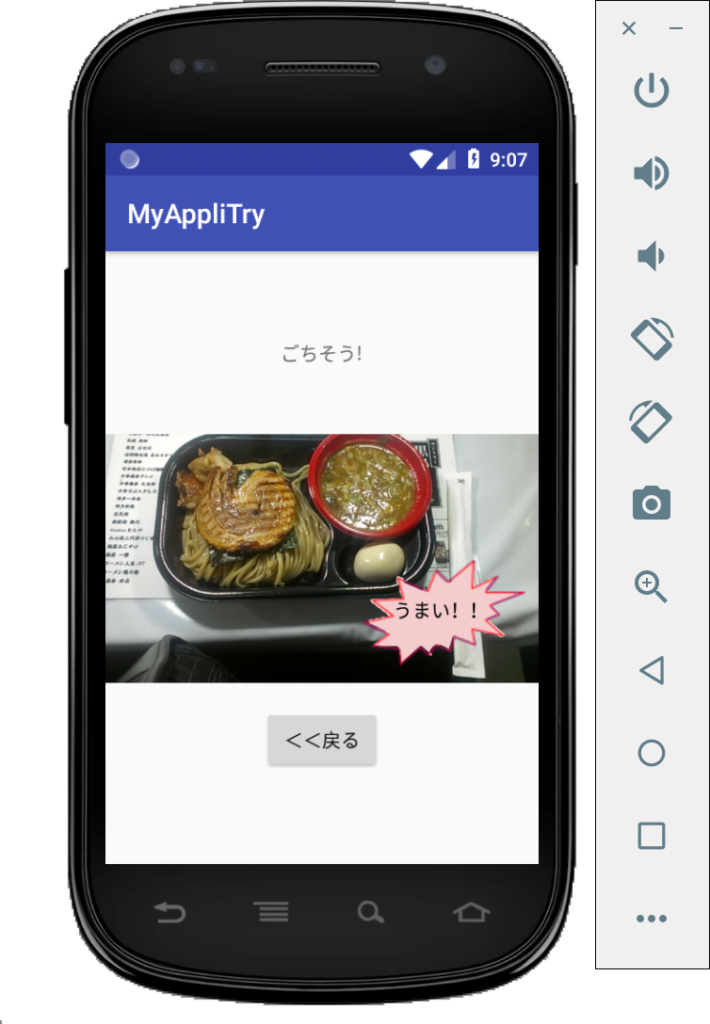
↓ 想定通り吹き出しの文字が出力されました✌
トーストも時間の長さやテキストの出し入れなど、もっと多様な使い方も
できそうですね。
今日はここまで✋
では、また次回。
